
One of the most important concepts in trading is correct position sizing. Many beginners find themselves indecisive or stuck when deciding how much capital to put into a single trade.
Choosing the position size is a big part of risk management. A wise choice can provide mathematical and statistical safety not only in a single instance but in the trading career as a whole.
The calculation of ideal size is a very simple process that requires so little time for how useful and effective it is.
In this article, we will illustrate a simple technique that can save you money, time, and therefore an entire career.
The main statement
You don’t choose the position size of your trade, but it is your trade that defines the correct position size.
In other words, it indicates how much risk the trade is going to imply. By knowing the percentage of risk in your trade, you’ll be able to understand the proper capital to put at risk.
Everything will be clearer as we proceed with the article.
Establishing a range of risk per trade
First of all, we must identify the percentage of our total capital that we want to risk in each trade. This rule is fundamental to calculate the correct position size, but especially for monitoring and avoiding the risk of ruin.
Risk of ruin is the chance that a trader has to blow up a substantial part of his capital (or the whole) when trading.
We want to maintain this probability as close to 0% as possible. Ideal if our risk of ruin is 0%.
This does not refer to a single trade only, because a trader can incur ruin in a series of trades also. This is why most professional traders manage their risk to be secure even after a long series of losses.
A long series of losing trades is statistically possible. Its probability depends on the style of trading and many other factors. So it is wise to consider even the worst case.
Let’s suppose we want our capital to be safe even after 10 consecutive losses: we need to set up a quantity of risk to use in each of our single trades.

As we see, surpassed 5% total capital risk per trade, the situation after 10 consecutive losses is pretty much screwed up. To recover a 50% loss we would need to make a 100% profit, essentially doubling the capital.
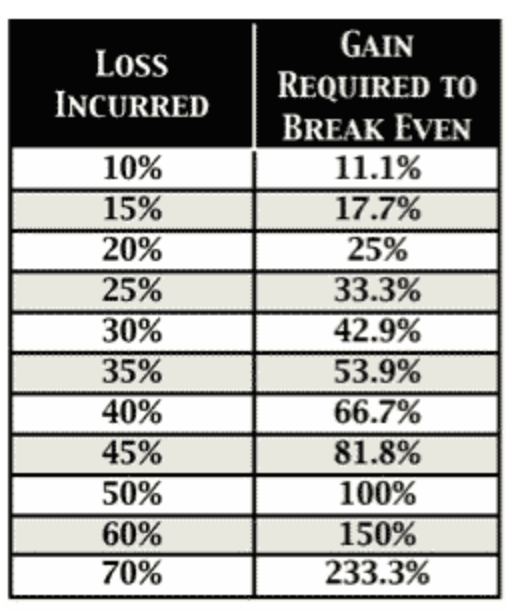
We can consider the region between 1% and 3% as pretty safe. To have more freedom, let’s say we set up a range of risk per trade to use.
1% to 3% risk per trade is a very nice range to keep us mathematically safe from ruin.
Step 1: Find the best stop-loss level
The first practical step is letting your trade talk to you.
Make your analysis properly, whatever its nature, and come up with a nice, safe, and sound stop-loss level. Now, calculate the distance in percentages between your entry-level (break-even) and the stop-loss level. That percentage is the best piece of information that your trade speaks to you.
Indeed, the stop-loss is what originally suggests the correct position size.
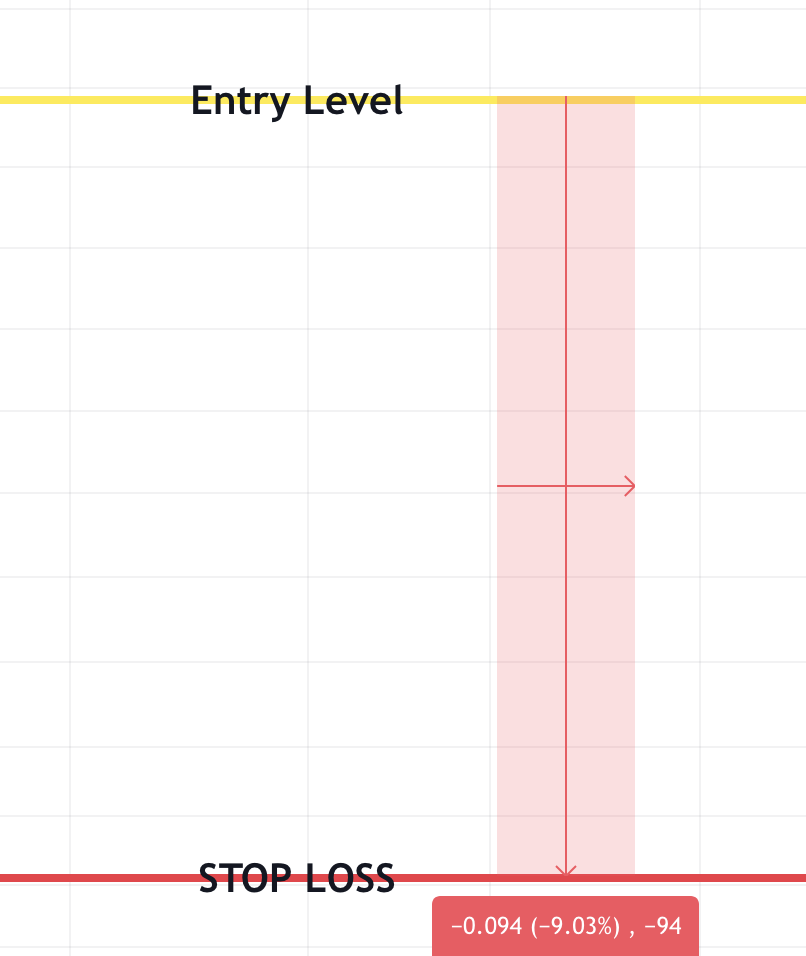
Always remember: make your stop-loss order a bit wider than the actual level to prevent being stopped out if your level is precise.
Taking into consideration the above example, let’s say we’re rounding up to 9.50% (because we make our orders a bit wider). Hence, our approximate risk at the current stage is 9.50%. But the risk range per trade that we established for our strategy (1% to 3%) is way less than that.
The percentage of loss calculated with the stop-loss has to fit in the total risk range per trade of our strategy.
Then, how do we proceed?
Step 2: Calculate position size to match 1% total risk
It’s easier than you may think. What we need to do is to transform that 9.50% into 1% without changing our trade set-up. In other words, we have to maintain a 9.50% single loss defined by the level of our SL within the boundaries of a 1% total capital loss.
There are three reasons why we are going to transform it into 1%:
● 1% is the low extreme of our risk range
● It is easier to process
● It gives us the freedom to adjust the risk-o-meter as our sentiment suggests for the single trade (we will deepen this in the next step)
Transforming 9.50% possible loss of the single trade into 1% of total capital risk would mean reducing the position size to match the proportion.
This is how we calculate the correct position size for this trade:
100% divided by 9.50% ≈ 10.5%
100% is the total capital; 9.50% is the possible loss; 10.50% is the position size.
In this example, the correct position size to match 1% of loss is 10.5% of our total capital. When we set up our trade with a 10.5% position size and 9.50% stop loss, our total loss will be 1%.
The formula is:
100 / x = y ;
Where 100 is the total capital, x is the stop-loss percentage, and y is the resulting position size.
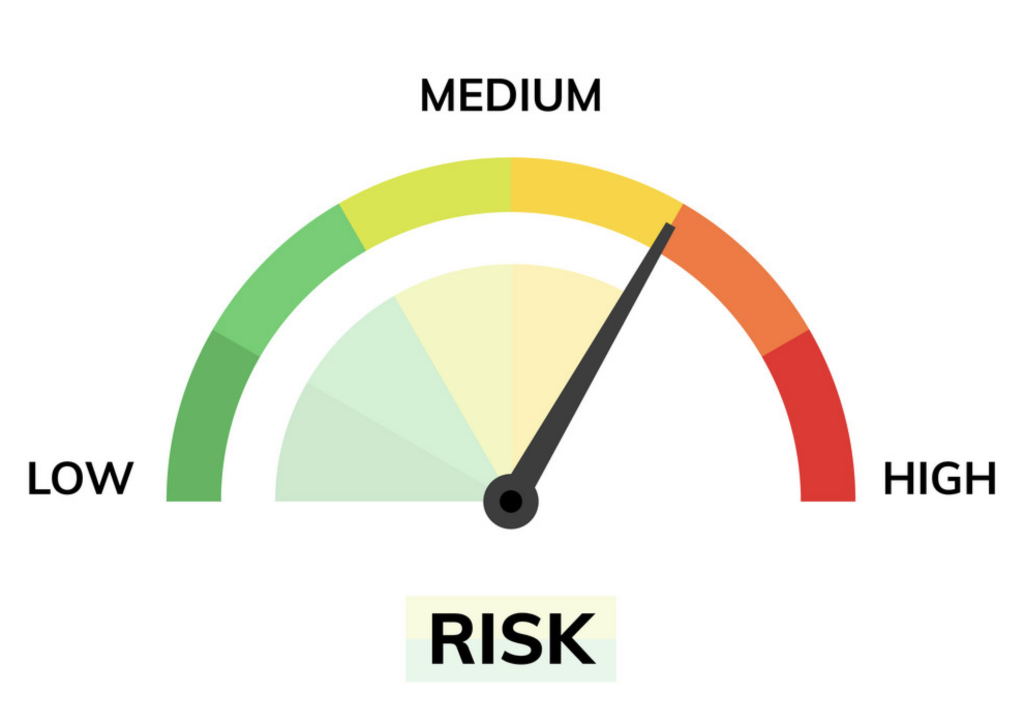
Step 3: Adjust your risk-o-meter.
The next and last step is to multiply the resulting position size per the quantity of risk you want to take for that trade.
Your risk-o-meter displays the 1% to 3% range. 1% represents your starting risk.
If your sentiment and analysis suggest that the trade is good, and you want to increase your risk – just multiply the position size by the risk you want to take within the risk-o-meter range.
For example, in the trade that we discussed before you want to increase your total risk to 2.50%.
10.5% x 2.50% = 26.25%
Your new position size with a 2.50% total risk is 26.25%. With this position size, you can set a 10% stop loss while still losing 2.50% of your total capital, which is perfectly within the range of your strategy. Disciplined, tidy, and clean.
Beginners make this mistake
This whole technique may lead the beginner trader to tighten the stop-loss levels, to be able to apply larger leverage or position size. Such behavior is dictated by greed and a bad attitude towards our rules.
This is why it’s so important to analyze before doing any sizing: it’s our stop-loss that tells us what our position size should be. Making a proper and unbiased analysis, then adjusting our risk to that information. Any inverted process would lead to randomness and mathematical vulnerability.
Why don’t we just calculate straight to the quantity of risk we want to use?
If you’re asking yourself why we first calculate the position size to match 1% risk instead of going directly to 3% risk or whatever number within your risk range: the answer is not simple.
Anyway, we can summarize by saying that starting always with the lowest number in the range helps us on a psychological level to measure and weigh the proper quantity of risk for the trade.
If you want to use leverage
This context enhances the risk component of leverage. It’s pretty obvious that high leverage, in such statistical visualization, is very dangerous.
Anyway, it is a powerful instrument, and if power is associated with matching wisdom, very nice profits are behind the door. Otherwise, only ruin.
To a certain degree, multiplying position size per the amount of risk you want to use that is higher than 1% is like leveraging, but just with your own capital. Therefore, you could use leverage as a substitute. As a consequence of our risk range, we could use up to 3x leverage, unless you risk less than 1%. For example, if and only if you are an incredible trader and manage to keep a high win-rate with tight stop-losses, you could use:
5x for 0.60% SL;
10x for a 0.30% SL;
20x for a 0.15% SL;
and so on.
For example, this level of leverage could be easier to use in low-volatile markets. As the volatility increases, the difficulty of using high leverage increases.
Doing more than what your risk range establishes would mean increasing too much the total risk and tightening up the liquidation price, reducing SL freedom, and increasing the risk of ruin to astronomical levels.
Ignorance of the statistics of risk of ruin is the main reason why traders blow up their accounts with high leverage.
But if you want to use higher leverage, the easiest and safest solution would be to make a whole new account and fund it with 3% of your total capital. In this way, you would be still risking within your established range; you’re also out of the risk to liquidate your entire capital, and you have the freedom to use high leverage. Moreover, having a separate account gives you optimized management and way fewer calculations to do.
In conclusion
Correct position sizing is a big chunk of risk management. A trader that is good at sizing has already solved plenty of mathematical and statistical threats.
To calculate the correct position size we firstly need to protect ourselves from the risk of ruin. We must set a risk per trade range to use in every one of our trades. This rule is one of the fundamental pillars of our strategy.
The practical steps are:
● Make your proper and unbiased analysis and come up with a stop-loss level, then individuate the percentage of possible loss.
● Divide 100% (your total capital) by the percentage of possible loss: you obtain the position size for a 1% total loss with that specific SL.
● Decide if you want to keep your risk low (1%) or push it higher to a max of 3%: in this last case, multiply the position size by the risk you want to take.
While this technique is useful and powerful for disciplined traders, undisciplined and greedy traders may find it difficult to stick to their initial analysis. They may be unsatisfied with the resulting position size and tend to tighten the stop-loss, making themselves vulnerable to statistics.
As always, it’s all about discipline: with such technique, a trader can protect his career and take his risk management to the next level.
Everything described in this article has the sole purpose of being informative and providing general information. The author has no intention of providing any financial advice, legal advice, or tax advice. Do not rely on this article to make investment decisions. Seek professional help before making any such decision. The author does not take any responsibility for loss or damage of any nature. The use you make of the information contained in this article is your sole responsibility.